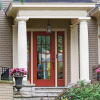
Step 1 - Preparation & Protection
Protecting your property is very important to us. We drape furniture, lay down tarps, and depending on the area around the door, we may hang plastic sheeting to control dust movement.
Step 2 - Remove interior and exterior trim
Before we can remove the door and main frame we must cut the caulking, remove the interior and exterior trim, and remove the 1×4 nailing boards around the exterior of the frame.
Step 3 - extract door and existing frame
To help minimize dust during the demolition we remove the door towards the end of the process prior to extracting the main frame.
Step 4 - prepare the opening
We make sure the opening is completely clear of any debris such as old mortar, caulking, nails, and insulation. Then we use a vacuum to clean up the smaller particles.
Step 5 - If required, install a sub-sill
If your interior’s finished floor is higher than the exterior stoop, then we will install a treated sub-sill and cap it with an aluminum cover. This allows your new door to open freely above a rug or entryway mat.
Step 6 - Set & Align main frame
We are now ready to install your new door! Once the door and frame are set, the craftsman will align the frame squarely in the opening using composite shims, then attach the frame to the structure of the house.
Step 7 - Foam around exterior frame
A commercial foaming gun with a fine needlepoint allows us to get into some of the smallest openings with the expanding foam insulation and water barrier.
Step 8 - Install Door Hardware
This includes all the components such as door handles and locks.
Step 9 - Apply interior & Exterior trim
In most cases we install new trim, but occasionally we preserve and reuse the existing custom trim.
Step 10 - Clean door and Polish wood
If it’s a wood door we use lemon oil to clean and polish the finish. For steel, vinyl and fiberglass doors we use the appropriate cleaner prescribed by the manufacturer.
Step 11 - Apply sealant adhesive
This sealant is the first line of defense against wind, rain, and other harsh elements. We use the proper sealant recommended by the door’s manufacturer to provide the best long-term protection.
Step 12 - Cleanup of the job-site
The #1 thing our customers remember about the installation is how our crews always clean up after themselves.
Remember, when you hire Designer Door and Window you are choosing a company with well-trained employees to do the installation right the first time. This is for your peace of mind.
About Designer Door & Window
Designer Door and Window in Plano is the best source for home improvement products and services including replacement windows and doors. We specialize in the design, build and installation of steel, wood, and energy efficient fiberglass, lead safe, warrantied exterior doors and windows for your Dallas area home. Visit us today in our 2,700 square foot showroom to see our collection of top of the line doors – designed by inspired artists and available in a variety of materials.


